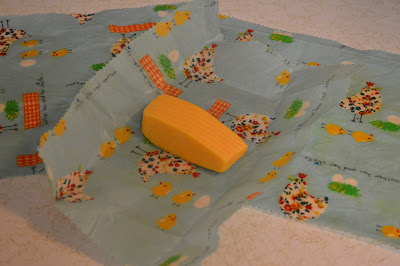
I made a bunch of beeswax cloth a few weeks ago bringing us one step closer to a plastic free kitchen! It is simple to make and even easier to use. We wrap food (like cheese and sandwiches) and cover bowls and jars with them. And they smell so sweet and good!
You will need ::
Beeswax - if you do not have pellets like I did you can use an old cheese grater. But the wax is really hard to get off so you need one that will only be used for this project. I got my beeswax from Mountain Rose Herbs.
Fabric - I recommend only natural fibers for this project. Cotton or linen is ideal. I used lightweight cotton for my wraps. Cut the fabric into any shape or size you want. I used pinking shears to keep the edges from fraying. Make sure it is clean and lint free.
Cookie sheet - lining your cookie sheet with foil will make clean up a breeze!
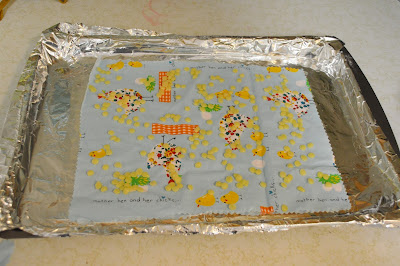
Heat your oven to 170 degrees. Put your fabric on the lined cookie sheet and sprinkle the beeswax on like the photo above. You do not need to cover the entire surface as it will spread as it melts. Put it in the oven for 6 or 7 minutes. remove as soon as all the beeswax is melted.
Once it is out of the oven you will need to work fast! The wax will start to harden as soon as it is out. Hang the cloth up and let it cool. If there are spots with no wax put it back on the cookie sheet and put a small piece of wax on the bare parts and pop it back into oven. If you ended up with too much wax put it on top of a fresh piece of fabric and put it in the oven for a few minutes.
Use the heat of your hands to mold the beeswax cloth to whatever you are wrapping. It will also stick to itself or to the rim of a bowl or jar to create a seal. You can wipe it clean or wash it with cool, soapy water then air dry. Just do not use hot water, of course.
So there you go! Bye-bye plastic wrap!


