
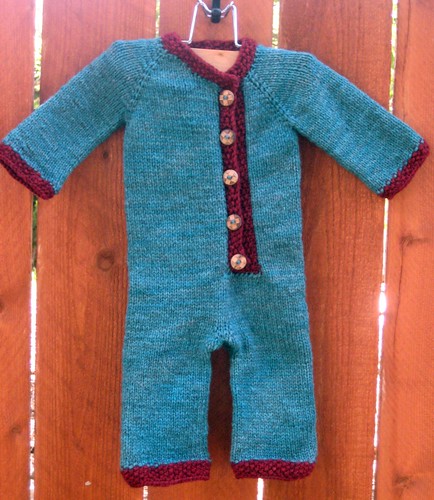
i cast on this wool romper for baby several months ago while there was still snow on the ground. the yarn is cascade eco wool-it was originally gray and purchased for another project. one afternoon, on a whim, i decided to over dye the gray wool and whip up something wonderful for the little one growing in my womb. and this was the wonderful result. i think the first photo most accurately captures the colors i ended up with.
as for the pattern, it was completely improvised starting with a free sweater pattern. now there are two little romper patterns available for purchase from sweet mama-small sugar. her patterns were not yet published when i knit this romper, but if they had been i likely would have gone that route and saved myself quite a bit of figuring and guessing.
for those of you that would like to knit your own improvised romper i am sharing with you how i made this one. enjoy!
 i started with the mossy jacket sweater pattern. since my baby was expected in the spring and i wanted him to wear it the following winter i cast on the 12 month size. i simply knit the pattern as written but did not cast off at the bottom of the sweater, but rather continued to knit the "pant" part of the romper. once i completed the button band i added stitch markers to each hip- i added the first hip marker where it looked like it ought to go, then knit half the stitches on my needles and added the second hip marker. i did not add short rows to the bum area, but you easily could for extra room, especially if the romper will be worn by a cloth diapered baby.
measure your baby from armpit to right below the hip. knit in stockinette until you have reached this measurement, then you can begin your crotch gusset. you are going to add two more stitch markers by dividing the stitches between your hip markers by 2 and adding the markers accordingly. so if there are 50 stitches between your hip markers you will knit to the first marker, knit 25, place new marker, knit 50, place second new marker, then knit 25, back to the first stitch marker. it helps if the new markers used for the front and back look different than the two hip markers.
gusset ::
you can use any preferred technique for your gusset. i made mine like this.
row 1 : knit to 1 stitch before front marker and m1r, slip marker, k1, and m1l. pass the hip marker and repeat increases when you get to the back stitch marker.
row 2 : knit all stitches.
repeat these two rows until you have your desired amount of gusset stitches. i ended up with 10 gusset stitches.
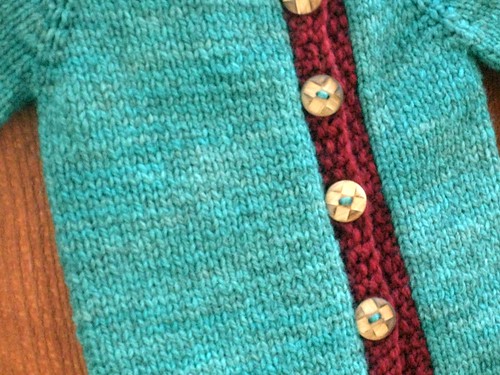
now you will knit the legs of your romper. knit one more row, placing the front and back gusset stitches on scrap yarn to deal with later. you can now choose to magic loop both legs at once or knit them singularly on dpn's. knit the legs to desired inseam, add a decorative cuff, and cast off. you will now need to go back and add the sleeves and button and neck bands as directed in the sweater pattern, then kitchener stitch the crotch gusset. lastly, choose the perfect buttons and sew them on.
 and there you have it, a super sweet wool romper, perfect for winter bundling! i will be sure to post photos of our own little bundled baby when he grows and the snow falls. this would also be adorable with short sleeves and short legs in a lighter weight yarn for spring wear!
happy knitting, friends!
Pin It
6 comments:
Gosh! That is really cute! I have bee playing with a overall pattern but have not been able to get back to it. Thank you for sharing this!
Oh I love this!! We need one :)
Holy crap that is SO CUTE!
That is super cute!
SQUISH! Oh how cute, makes me want to have more babies!! xo
Carina Spencer of ravelry put out a pattern similar to this one
http://www.ravelry.com/patterns/library/gift-wrap-romper
But, I love yours... I actually was looking at making one....she is charging 10.00 which is a little much to me....
Post a Comment